| Home : Course Map : Chapter 14 : |
|
More About Security
|
| JavaTech |
| Course Map |
| Chapter 14 |
| About
JavaTech Codes List Exercises Feedback References Resources Tips Topic Index Course Guide What's New |
|
Java security is a huge topic that involves not only the security manager but many other issues such as cryptography, public/private keys, certificates, and all that. Even a thorough discussion of permissions and the policy file is beyond the scope of this course. (See the references below for more information and tutorials about Java security capabilities.) However, the basics of setting permissions are fairly straightforward. Besides the java.io.FilePermission class, there are a number of permission classes that represent the various types of access to external or restricted system areas that the security manager controls. They include java.security.AllPermission
and seveal others. (See Permissions in the JavaTM 2 SDK for a complete listing.) These classes are all subclasses of java.security.Permission. The basic format of the grant statement goes as
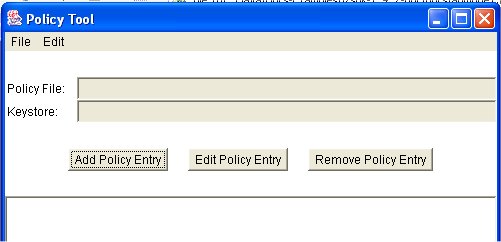
(See the Policy File Syntax rules for a description of a more elaborate form of the grant statement that indicates where to find certificates with the public keys needed to decode programs signed with private keys.) The codebase indicates the location of the code to which you are granting a permission. If you load a class from a different location, then the permission will not apply to it. If the codebase is empty then the permissions will apply to code from any location. In the above example, we used the "file" type of URL for referencing a local file (it requires forward slashes even on MSWindows system.). Some of the permissions require a target name and a listing of the particular actions allowed. See, for example, the java.io.FilePermission case mentioned in the previous section, You can make the policy files by hand but an alternative is to use the policytool program supplied with the Java SDK. It provides a graphical interface in which you specify the details of the policy such as the directory where you want the policy file, the codebase information, what permissions you need, their target name and action settings.
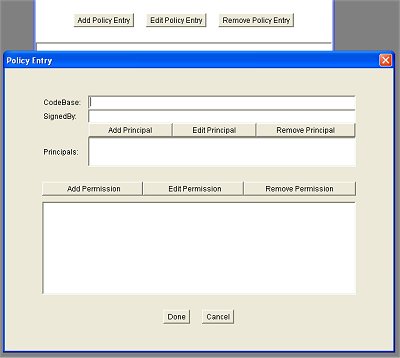
To create the file permission we select the "Add Policy Entry" button. This will bring up a dialog for entering the codebase and the permissions:
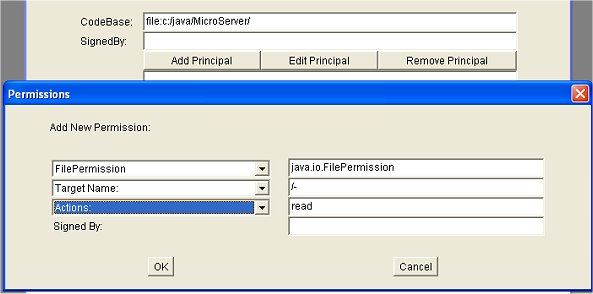
In the codebase field we enter "file:c:\java\MicroServer\". We hit the "Add Permissions" button to bring up another dialog to specify the permissions:
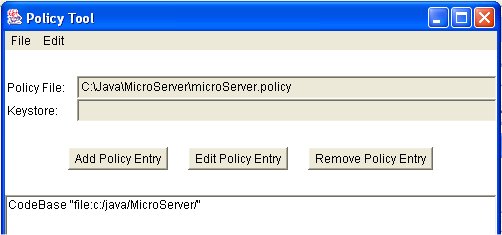
Choosing from the dropdown menus on the left hand side, we can choose the particular permission, target name and actions options. We can also edit the fields on the right side. Here we entered by hand the "/-" target field since the menu did not offer that option. You then close the dialogs and in the main window you choose from the File menu and save the file to the desired directory as in:
It can arise that a program should check if a particular action is allowed before attempting it. Perhaps your create a class that will be used in other programs with which you have no control. It might waste a lot of execution time, for example, if an action in the final step is not allowed. You can check if an action is allowed by first creating an instance of the particular permission and passing it to checkPermission(java.security.Permission) in the SecurityManager classe. If it throws a SecurityException, you will then know the action is not allowed. For example, you could check on the access to files with the following:
References & Web Resources
Latest update: Dec. 9, 2004
|